Happy Wednesday everyone!
If I would've posted yesterday,
it would have been ....rain, rain, rain
{cuz it's been doing that for many days....}
and back to me complaining.....
{update....this is now day 2 of this post, and
it is now raining again....blek....}
{update....this is now day 2 of this post, and
it is now raining again....blek....}
but ~ today is a lovely fall day ~
phew......I'm not ready for the
non-stop rain yet....
I've had lots of requests for sewing tutorials
and so I finally got one together for you~
It might be a little lengthy
~warning very long post~
~warning very long post~
but before I bore you all to d e a t h ....
I have a shoppe announcement....
I am now offering DIY pillow kits!
the kits will have:
*fabric cut to size with images already transferred
*envelope closures cut to size
*piping pre-made {if applicable}
*pre-made ruffles {also if applicable}
*detailed instructions w/ pictures!
so you can save money & have fun create pillows at home!
if interested head over to
my Etsy store and take a look!
click here for diy kits
I am continuing to add more kits, if you don't see
the pillow you want listed yet,~ just let me know!
~*~
So here's the pillow we're making today~
I have a shoppe announcement....
I am now offering DIY pillow kits!
the kits will have:
*fabric cut to size with images already transferred
*envelope closures cut to size
*piping pre-made {if applicable}
*pre-made ruffles {also if applicable}
*detailed instructions w/ pictures!
so you can save money & have fun create pillows at home!
if interested head over to
my Etsy store and take a look!
click here for diy kits
I am continuing to add more kits, if you don't see
the pillow you want listed yet,~ just let me know!
~*~
So here's the pillow we're making today~

With this pillow, I used an image
using an ink transfer method I blogged about
a month ago or so....
go HERE
to see the tutorial
{btw....the picture shows an iron-on image, but
the actual pillow is an ink transfer}

Supplies Needed:
16 x 16 piece of fabric for front of pillow
(2) 11 x 16 in. fabric pieces for back closure
65 in. (4 x 16 + a little extra) piping cord
a 2 1/2 inch strip of fabric approx. 65 inches long for piping
135 in. of fabric cut in a 2 1/2 inch strip (8 x 16 + extra) for the ruffle
Once your image is in place, and your
fabric is ironed you're ready to go....
Because this pillow has both piping and ruffles,
I'll do the piping first since it lays in front
of the ruffle on the pillow.
PIPING
cut a strip of fabric approx. 4 x the width of the pillow
{assuming a 16 inch square pillow}
so 4 x 16 inches, plus a couple inches
the fabric should be about 2 inches wide
then you will simply fold the strip over the
cotton cord....like so......

you will need to use a zipper foot,
in the photo below, it's the one on the right
{now don't panic.....it's very simple and
only a $10 item at your local fabric store! :)}
just swap out the feet & you're ready.

the zipper foot allows you to stitch right
next to the cord....like so....

stitch all the way
along the whole strip of fabric...like dis.....
once that part is done you can attach it to the
pillow square~
lay the piping down on the pillow
with raw edges together and pin in place
....like so....

now still using your zipper foot,
stitch the piping in place taking special care
around the corners....snip the fabric like
so.....at the corners, but be super careful
not to cut too close to the seam.


now you need to connect the piece
where it comes together....
there are several ways to do this, but
I usually use a little piece of fabric
tape and wrap it around, then hand stitch
it together.

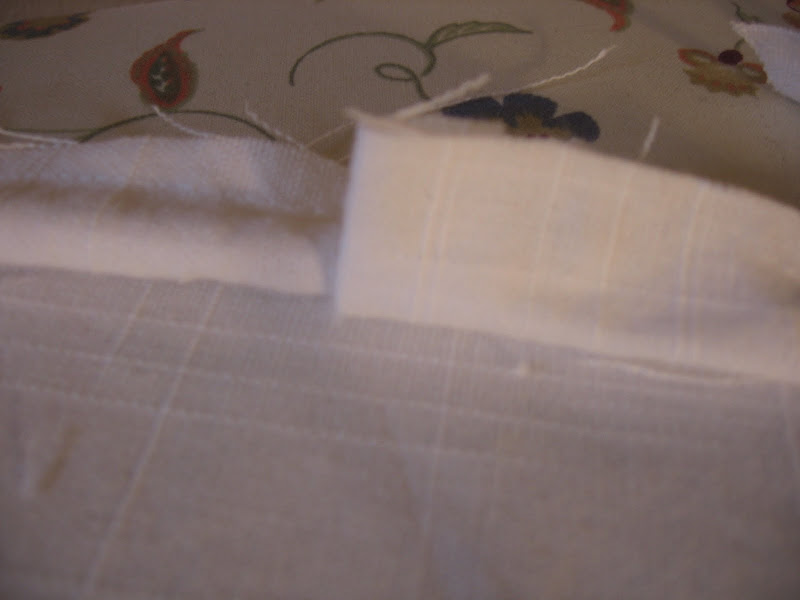
once you do that, you'll need to finish the fabric portion of the piping.....just fold under about
a 1/2 inch of the fabric and then lay it over
the other piece....
{ok sorry...very confusing....the pictures should help!!!}

and pin it and sew into place on the
pillow.....like so....


ok...now we're ready for ruffles.....
all of you who are bored stiff ~ it's ok...
now's a good time to click close and
do some more blog hopping....hee hee ;)
the rest ~ here we go!
this ruffle happens to be a raw edge ruffle....
so the first thing that needs to happen
is the making of the raw edge...
just grab a thread on the top edge and pull....
you will pull about 5-6 threads
all the way down.
once you've pulled off several strands
you are ready to make the ruffles.....
{disclaimer.....somehow I deleted the pics showing how I made the ruffles....
but this one kind of gives you an idea!}

just lay the strip of fabric under the regular foot again, (the raw edge will be facing away from the machine)
and fold over about a 1/2 inch of fabric away from you, aboutevery inch or so, depending on how tight you want the ruffles to be....
for looser ruffles, just fold over 1/4 inch of
fabric and leave more space in between,
and vice versa for tighter ruffles.
I have found this method to be much easier
than other ruffle methods.
I also vary the direction of the fold every so often
to give it more of a random feel.
OK....
now the last few of you who are still with
me.....let's continue on :)
time to attach the ruffle to the pillow~
lay the ruffle on top of the piping,
with your newly created raw edge towards
the middle of the pillow ~ line up the cut raw edge with the raw edge of the piping and the pillow.


also, make sure your seams are now facing UP ~
so when on the pillow they don't face forward....
now pin the ruffle in place going all the way around
the pillow and using your zipper foot again,
stitch into place
now your pillow should look something like this

ok...anyone who's still with me deserves an award!
seriously, I'm bored with myself here!!
hee hee....
ONWARD!!
the last step is the back envelope closure....
my secret recipe for envelope closures....
whatever the length of the pillow
16 inches in this case...
divide in 1/2 and add 3 inches
for the 2 back pieces
16 x (8 in. + 3 in.)=11 in.
so for this pillow
I will cut 2 pieces of fabric 16 x 11
for a nice hem, fold over 1/2 in of fabric
the full length of the 16 inches, iron
then fold over the same piece another 1/2
inch and iron again~
then stitch straight across from side to side

now you will lay these newly hemmed
pieces right sides down ~ on top of the pillow
(right side up)
line up the raw edges and stitch your first piece into place
like so......

it's a lot of fabric so you may need a heavier
duty needle.....
and a zipper foot at this point will work best so you
can get right up next to the piping

next lay the other piece on overlapping with the first
piece, of course right side down....
lining up raw edges and pin & stitch into place

you may notice on this pillow back
I used a longer back piece....
it was before I came up with my special formula ;)
so I know it looks longer than 11 inches.
{yours will overlap closer to the middle
I've found you need about a total of 4 inches
extra where the pieces overlap to ensure
the envelope closure stays closed once the pillow
insert is in!}
Guess what?
you're just about done!
now if you like ~ trim and zig zag stitch
the inside raw edges, and give it a little pressing...
turn right side out ~ insert pillow
and place happily on your sofa!! :)

let's see in this case I think the
blog post took longer than actually
making the pillow!!
If you have any questions, please
let me know ~ I'm happy to help!!
Have a great weekend & a fun Halloween!
xo,
Shellagh
















.jpg)