Hello everyone!!
Hope you enjoyed a great holiday
weekend......
our family always loves an extra day....
but I honestly cannot believe tomorrow
is the first day of school....:(
tomorrow morning will be a r.u.d.e
awakening....yikes!
{early mornings=boo!}

awhile back I learned a very handy
transfer method for burlap......
easier than using a stencil....
quicker than fabric paint....
it's the method I use in my linen shoppe
to create the images on pillows such
as this one
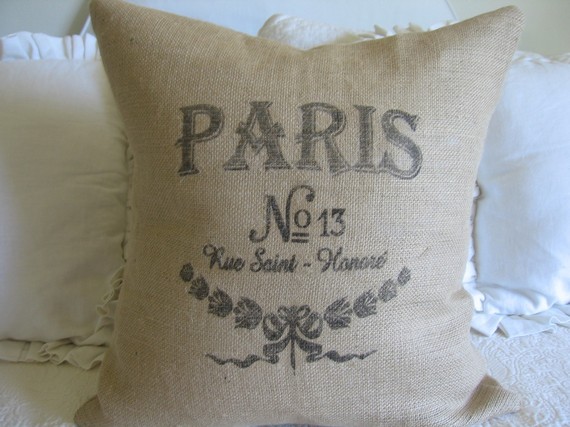
it takes just a teeny bit of practice ~
but once you get it the possibilities are
endless!
So here' what you need:
image
burlap
image transfer paper
iron
hard table top
OK....I've tried several types of transfer
paper & this is the ONLY one to use!

it's by Wilton
called Jolee's Easy Image Transfer Paper
"light"
I buy mine at Michael's
seriously, do not waste your money
on other brands unless you want a sticky
nasty mess on your hands! :)
Ok...so throw out their instructions...
hahahaha!
no really!
1) prepare your burlap...iron if necessary
and decide where you want your image
(I use masking tape to secure the burlap in place
so it doesn't shift around on the table)
2) print your image (use the mirror image
in your print preferences if you're using any text)
put the transfer paper in w/ the red line "up"
btw....tons of free graphics at
3) once you've printed your image,
cut around the image as close as you can
while leaving just enough (maybe a centimeter)
around the edges, so you can peel it off after
ironing it on.
4) k...now make sure there's no water
in your iron & it's on the hottest setting
*tip*
if it's a larger image with multiple words
or whatever, cut them out individually....
5) place the image where you want it
& press straight down...(so it doesn't shift around)
once you initially iron it so the glue is activated,
you can move the iron around a bit & make sure
you get every little area of the image....
6) now once you feel pretty confident you've
ironed the whole image down securely....
start to pull off the paper..
*huge tip*
this is where the trick comes in....
very important!!
you will want to iron right where you
start to pull off the paper ~ right before
you pull the paper off...
meaning...the paper has to be super hot
when you start to peel it off or the glue will
show up! I basically keep ironing as I'm pulling
it off....otherwise it doesn't work right!
super hot paper=no glue residue or glossy background!

*one more tip!*
if the paper is hard (at all) to pull off ~ you know you
need to re-iron ie..heat up that section again...
keep it hot baby! ;)
that's it!!
no glue-y residue
no shiny glossy funky "iron on" look
awesome vintage looking graphic on your burlap!
one last thing to remember...do not
iron image after it's created!
Let me know if you give it a try!
Have a great day!!
xoxo,
Shellagh